Roller Blinds
Measuring for your new blinds is easier than you might think! All you have to do is follow our simple tips, double-check everything you do, and set aside some time to do it. Happy measuring!
This guide works for:
- Standard Roller blinds
- Double Roller blinds
- Enjoy Roller blinds
- Illusion Roller blinds
Standard Windows
Recess fitting
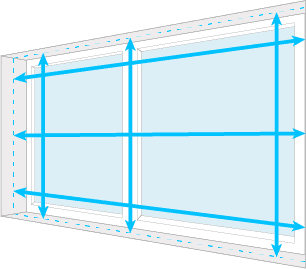
Measure the full width and height of the recess [the size of the hole if you like] and we will make the appropriate deductions to ensure a perfect fit.
- Measure in 3 places for both the width and the drop. For the width, compare the measurement at the top of the recess with the smallest of the measurements you’ve taken – if the difference between those is less than 25mm, use the measurement at the top of the recess. If it is not, use the smallest
- Don’t make any deductions, we’ll deduct from the width to ensure your blind fits perfectly (3mm for standard & double rollers, 10mm for Enjoy & Illusion).
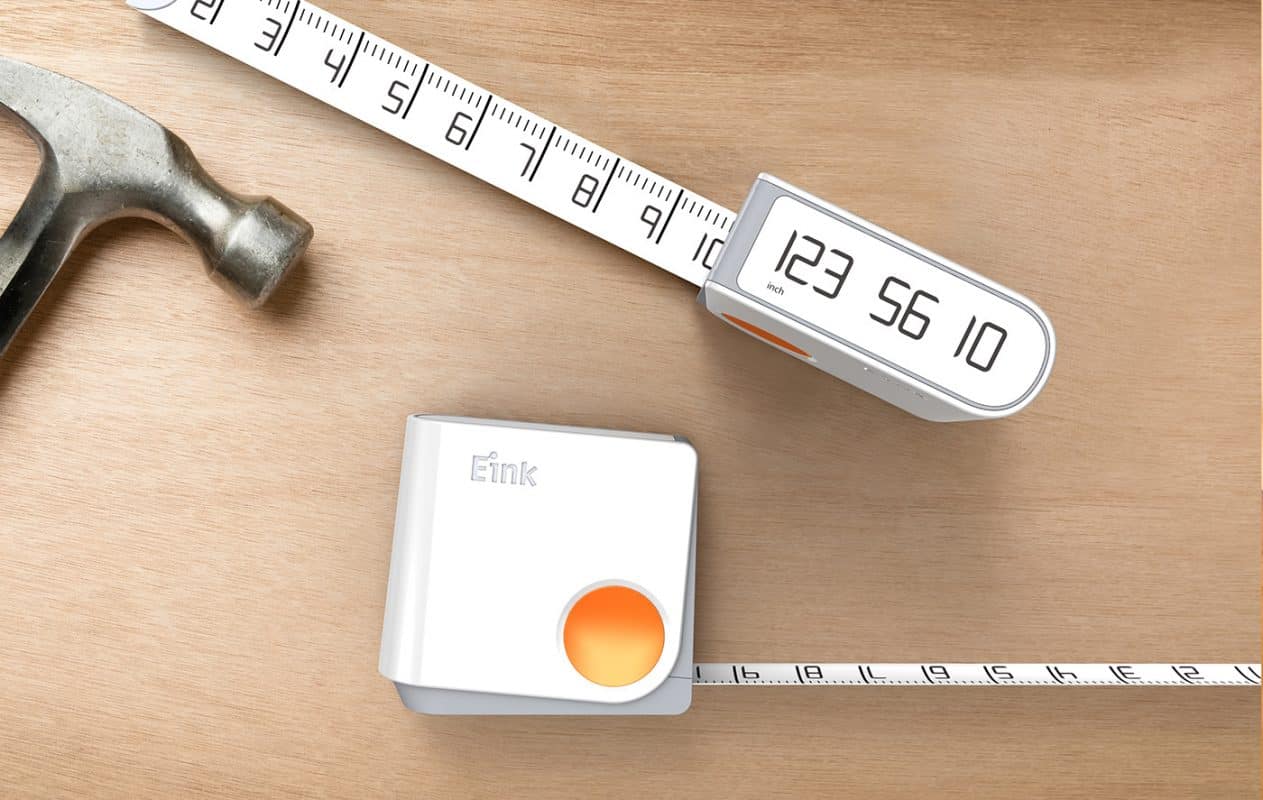
- Use a metal tape measure, cloth ones can stretch and give you inaccurate measurements
Top-Tip:
Check that your recess is deep enough to fit the blind into, also bearing in mind any obstructions such as handles (see table).
Standard Roller Depth
| Top-Fix | Face-Fix |
|---|---|
| 50mm | 70mm |
Double Roller Depth
| Top-Fix | Face-Fix |
|---|---|
| 120mm | 105mm |
Enjoy Roller Depth
Illusion Roller Depth
Exact fitting
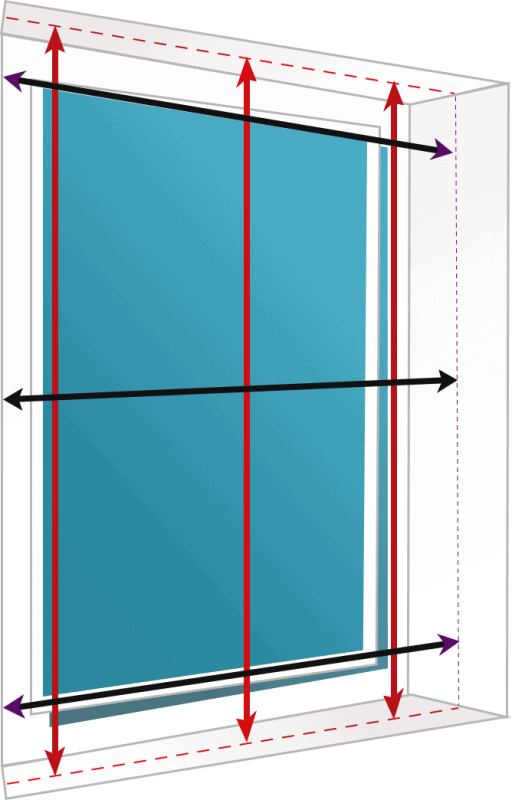
Measure the full width and height of the recess [the size of the hole if you like] and add a little extra to the top and to each side, we will make the blind to the size you specify with no deductions
- To minimize light leakage we recommend that the blind overlaps the window recess by at least 70mm at the top and 50mm each side
- The overlap at the bottom of the blind is a matter of personal choice but please take into account obstacles such as radiators
Other Windows
Part-tiled recesses
If you have tiles part-way up your recess (often the case in kitchens and bathrooms) then the space between them is most likely to be the narrowest point in the recess.
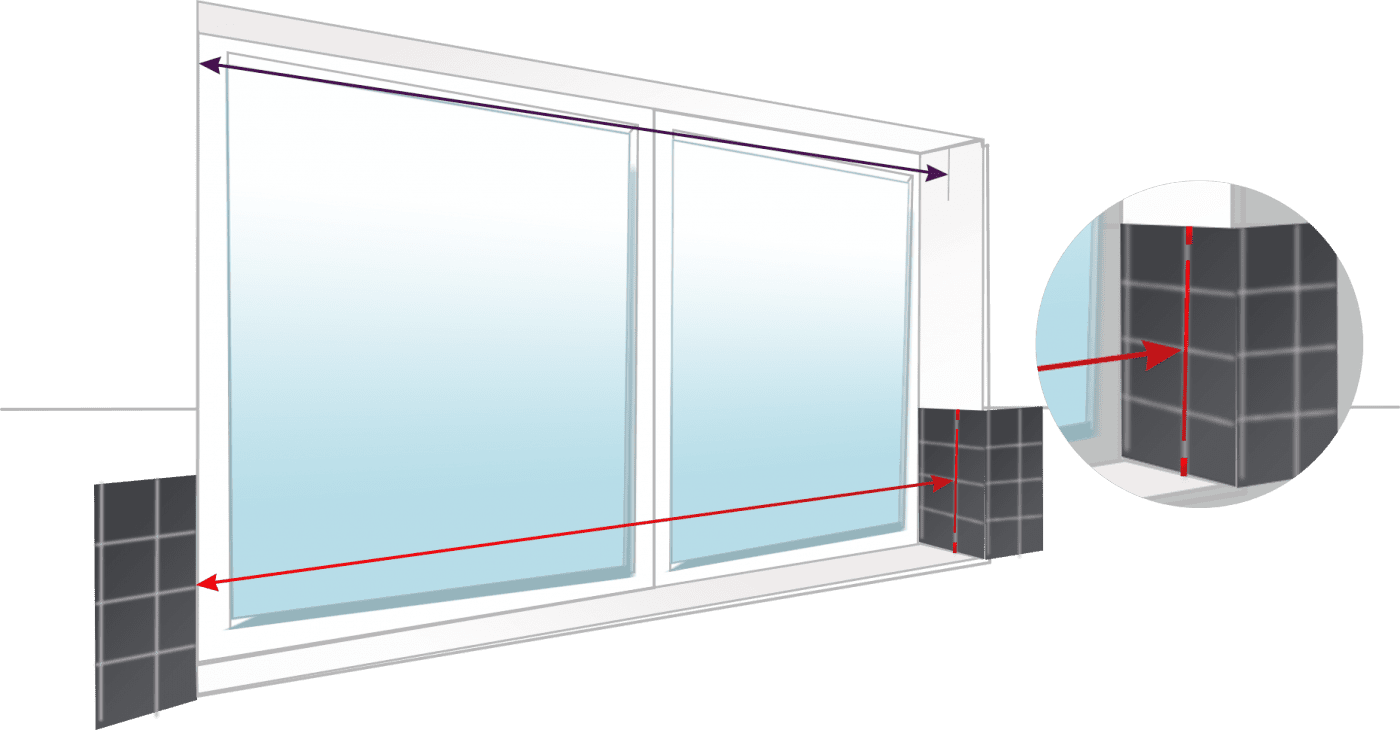
Measure at the top of the recess and between the tiles. Compare the two measurements; if the difference is less than 25mm, use the measurement from the top of the recess.
If it is not, use the width between the tiles. You will need to top-fix or face-fix your blind if this is the case.
Bay windows, half-bays & L-shaped windows
We have some handy guides already put together especially for roller blinds in bay windows, click on the links below to take a look!
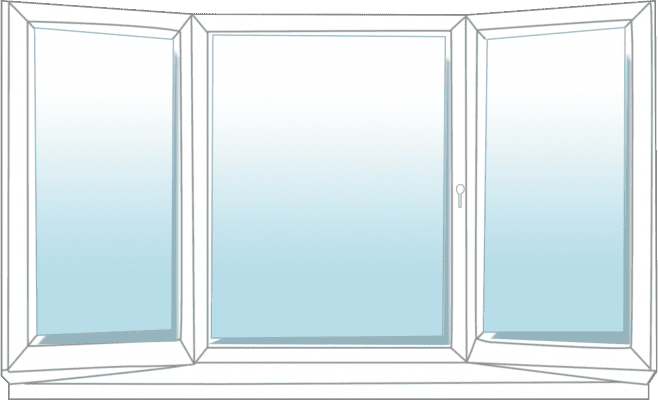
Angled bay windows
You can use these same guides for angled half-bay windows, it’s the same principle.
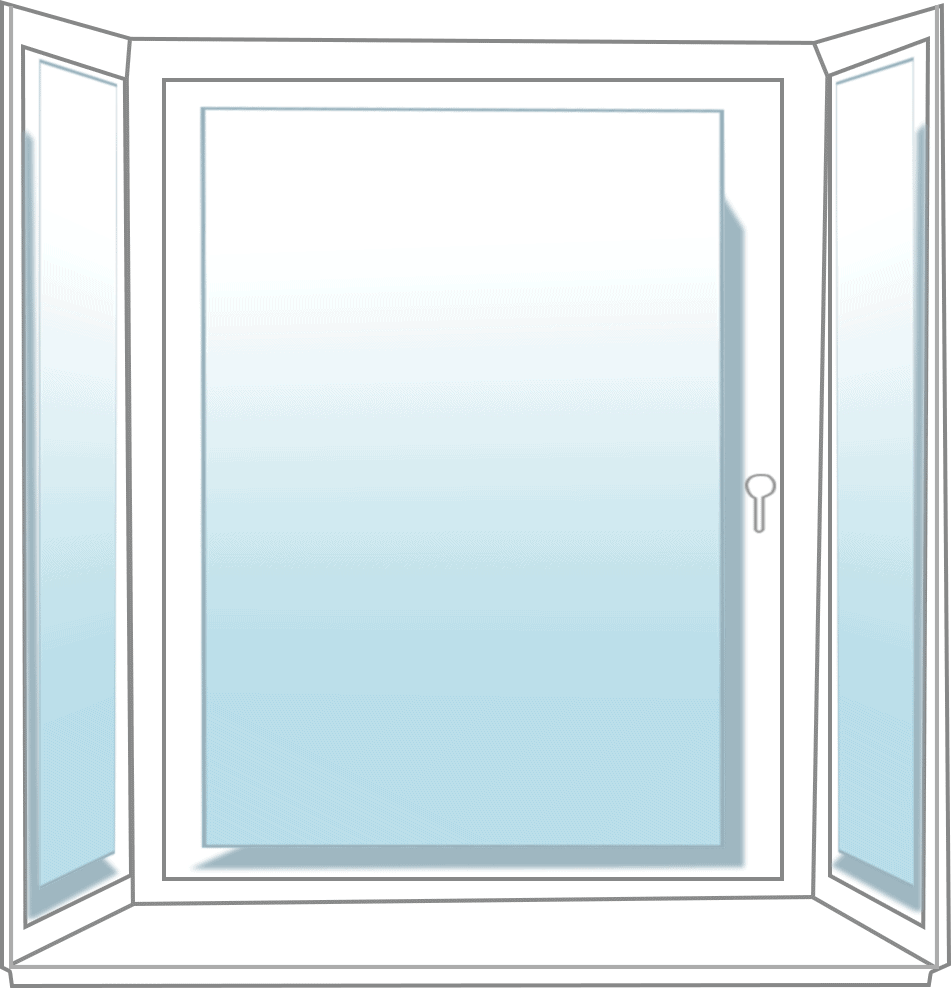
Square bay windows
You can use these same guides for L-shaped windows, it’s the same principle
Unique Features
When you choose exact fitting for a roller blind you are given two further options, either fabric width or bracket-to-bracket width (these options are not available for Enjoy or Illusion roller blinds).
Fabric Width

Fabric width is exactly as it sounds, the width of the fabric itself. We don’t recommend measuring for fabric width if you’re fitting the blind inside a recess.
Bracket-to-Bracket Width

Bracket-to-bracket width is the full width of the blind including the fittings. This is approximately 35mm wider than the width of the fabric.
Vertical Blinds
Measuring your new blinds is easier than you might think! All you have to do is follow our simple tips, double-check everything you do, and set aside some time to do it.
This guide works for:
- Standard Vertical blinds
- Rigid Vertical blinds
Standard Windows
Recess fitting
Measure the full width and height of the recess [the size of the hole if you like] and we will make the appropriate deductions to ensure a perfect fit.
- Measure in 3 places for both the width and the drop, use the smallest measurement
- Don’t make any deductions, we’ll deduct 10mm from the width and 15mm from the drop to ensure your blind fits perfectly
- Use a metal tape measure, cloth ones can stretch and give you inaccurate measurements
Exact fitting
Measure the full width and height of the recess and add a little extra to the top and to each side, we will make the blind to the size you specify with no deductions.
- To minimize light leakage we recommend that the blind overlaps the window recess by at least 70mm at the top and 50mm each side
- The overlap at the bottom of the blind is a matter of personal choice but please take into account obstacles such as radiators
Other Windows
Part-tiled recesses
If you have tiles part-way up your recess (often the case in kitchens and bathrooms) then the space between them is most likely to be the narrowest point in the recess.
Measure between the tiles to ensure your blind will fit.
Bay windows, half-bays & L-shaped windows
Here are some handy images already put together especially for vertical blinds in bay windows.
Angled bay windows
You can use these same image for angled half-bay windows, it’s the same principle.
Square bay windows
You can use this same image for L-shaped windows.
Wood, Faux-Wood & Aluminum Venetian Blinds
Measuring for your blinds is easier than you may think! All you have to do is follow our simple tips, double-check everything you do, and set aside some time to do it.
This guide works for:
- Wooden blinds
- Faux Wooden blinds
- 25mm Venetian blinds
- 50mm Venetian blinds
- Synergy Venetian blinds
Standard Windows
Recess fitting
Measure the full width and height of the recess and we will make the exact deductions to ensure a perfect fit.
- Measure in 3 places for both the width and the drop, use the smallest measurement.
- Don’t make any deductions, we will deduct 10mm from the width to ensure your blind fits.
- Use a metal tape measure, cloth ones can stretch and give you inaccurate measurements.
Top-Tip:
Check that your recess is deep enough to fit the blind into, also bearing in mind any obstructions such as handles (see table).
Wooden & Faux Wooden
| Slat Size | Depth |
|---|---|
| 25mm | 55mm |
| 35-38mm | 65mm |
| 50mm | 70mm |
| 63-65mm | 80mm |
Aluminium Venetian
| Slat Size | Depth |
|---|---|
| 25mm | 30mm |
| 50mm | 65mm |
| Synergy | 70mm |
Exact fitting
Measure the full width and height of the recess and add a little extra to the top and to each side, and we’ll make the blind to the size you specify with no deductions.
- To minimize light leakage we recommend that the blind overlaps the window recess by at least 70mm at the top and 50mm each side
- The overlap at the bottom of the blind is a matter of personal choice but please take into account obstacles.
Other Windows
Part-tiled recesses
If you have tiles part-way up your recess (often the case in kitchens and bathrooms) then the space between them is most likely to be the narrowest point in the recess.
Measure between the tiles to ensure your blind will fit. You will need to top-fix or face-fix your brackets in this case.
Bay windows, half-bays & L-shaped windows
We have some handy guides already put together especially for wooden blinds in bay windows, click on the links below to take a look!
Angled bay windows
You can use these same guides for angled half-bay windows, it’s the same principle.
Square bay windows
You can use these same guides for L-shaped windows, it’s the same principle
Unique Features
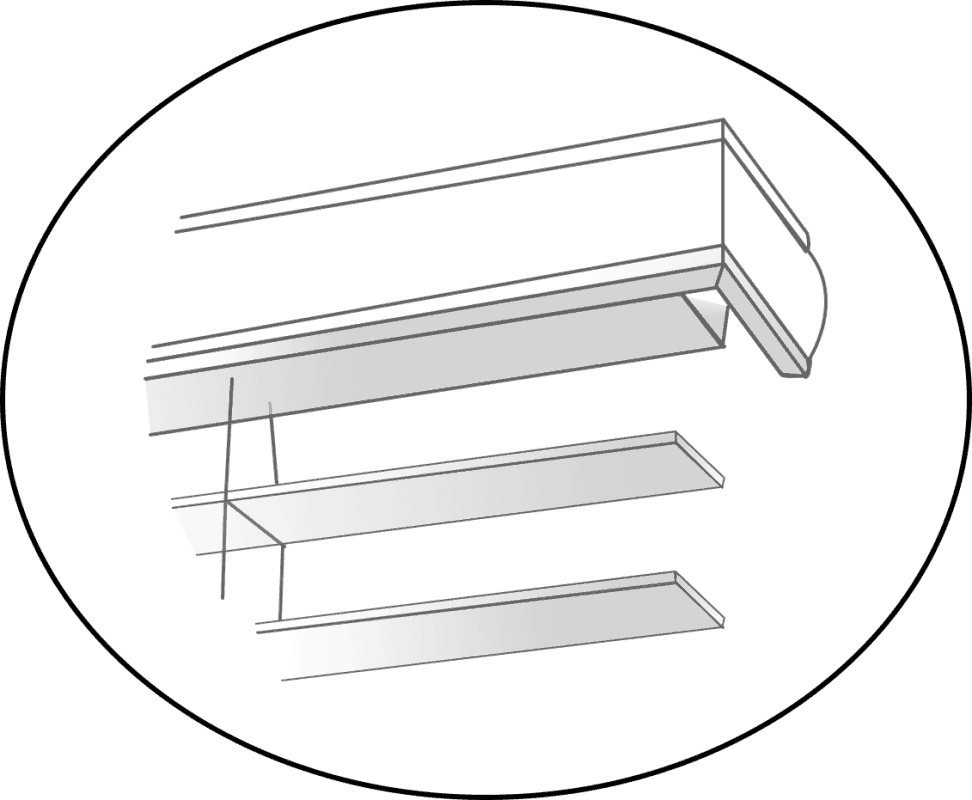
Some of our wooden and Venetian blinds come with a decorative pelmet, or valance, which covers the headrail. The blinds that come with pelmets are:
- Real wood blinds
- Faux wood blinds
- Synergy Venetian blinds
The pelmet is cut to the size and shape that is most suitable for the fitting type you’ve chosen:
Pelmets for Recess Fitting
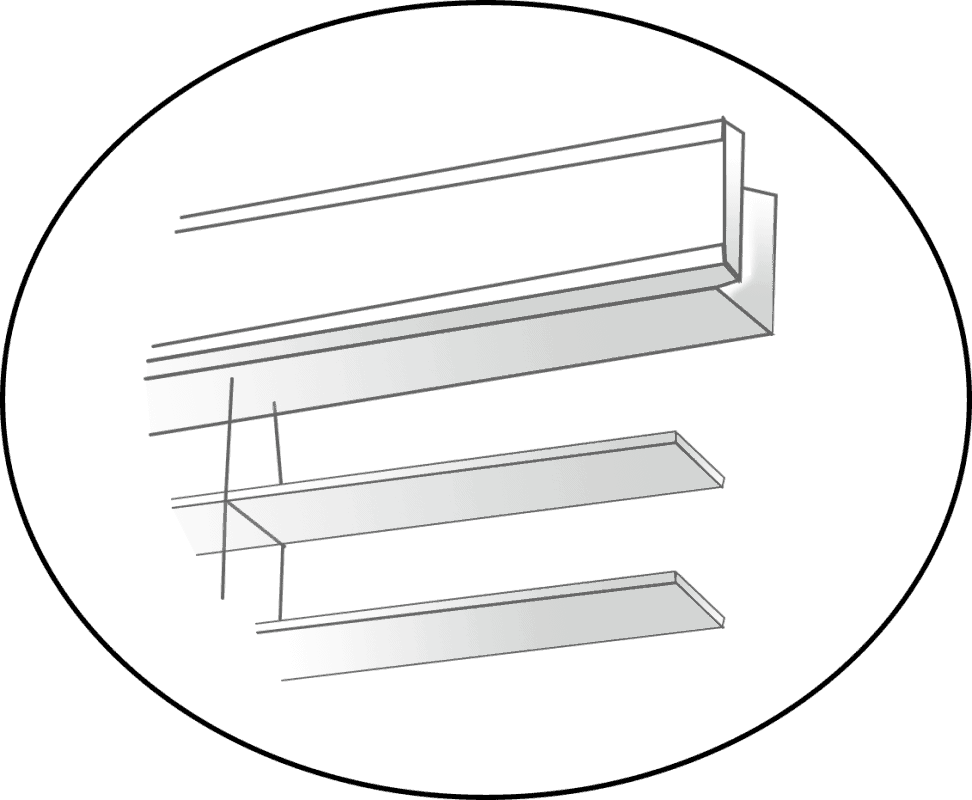
If you choose recess fitting we will make the pelmet for your blind slightly wider than the blind itself so that the pelmet is a tight fit at the top of the recess and to prevent gaps.
Pelmets for Exact Fitting
If you choose exact fitting we will make your pelmet a few centimetres wider than the blind and include side returns, so that the brackets are not visible either side.
Shutters
Measure Your Shutters
Measuring windows isn’t complicated and our measuring guides are super easy to follow If you are unsure at any stage just contact our team for advice. They can ‘mark up’ photos of your windows to show you exactly where to measure or simply point you in the right direction if you don’t know where to start.

Here’s exactly how our installation service works

Place Your Order
Start by choosing your favourite shutter style then select ‘Installed by Us’ before you start building your order online. You’ll need to enter your postcode just to check we have an installer in your local area. Please remember to attach a photo of your windows to your order to help us to assist you.
Shop Installed ShuttersCheck Measure
Once you’ve placed your order our team will give you a call to run through all of your order details, as we would with our DIY customers. After that we will let your local installer know that you are ready for your check measure appointment. They’ll call you to arrange a time to come round and measure your windows to double check the sizes on your order. After that you just need to confirm your order via the secure
link we’ll send via email


Build Your Order
We’ll start building your made-to-measure shutters at our specialist manufacturing facility. All of the components will be carefully cut to size, assembled, sprayed and finished. They will be carefully packed and shipped to our dispatch centre ready for your courier delivery.
Delivery Day
You’ll receive an email notification to let you know that your shutters are on their way. Once the courier has delivered
your shutters all you need to do is give them a quick
check over and call your installer to arrange your
installation appointment.
Installation
Your installer will arrive to install your shutters. You’ll need to be present for the installation but don’t worry! They’ll do all of the hard work and leave you with stunning, professionally installed plantation shutters.
Installation GuideCurtains
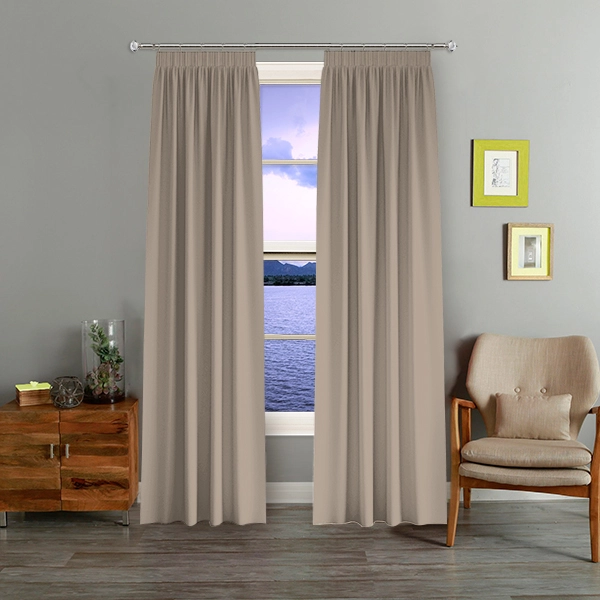
How to Measure for Your Curtains
Measuring for your curtains is a piece of cake! No deductions, no calculations we’ll do all of that for you to make sure everything hangs perfectly. Follow our simple (and we mean simple) guide below for your type of track or pole and let us do the rest.
Eyelet, Pencil Pleat & Pinch Pleat Curtains
Measuring the correct curtain width
Measure the curtain track or pole width, not the window width. It’s important that this is the measurement provided, as we’ll use your track or pole width to calculate the required amount of fabric for your curtains. For the most part, you will be unable to adjust the width of the curtains once they are made, so it’s important that the width measurement is as accurate as possible. If fitting a new track or pole, this should extend 15cm to 20cm either side of the window and at least 15cm above.
Curtain poles
For a curtain pole simply measure the width of the pole between any finials or end caps, that is the width you should enter.


Curtain tracks
For a standard curtain track simply measure the full width of the track, that is the width you should enter.
Curtain tracks with overlap
If your track has an overlap in the centre, measure the full width of the track (a) and the width of the overlap (b). Add the two together and that is the width you should enter.
Measuring the correct curtain drop
Curtains can be hung either to the floor, to the sill or to below the sill. We suggest that curtains finish either;
Pencil & Pinch pleat pole heading
When using a curtain pole, measure from the underside of the decorative ring to where you want the curtain to finish at the bottom.


Pencil & Pinch pleat track heading
When using a curtain track, measure from the top of the track to where the curtain is to finish at the bottom.
Eyelet heading
Our eyelet heading curtains will fit poles up to 30mm in diameter. Simply measure from the top of the pole to where you want the curtain to finish at the bottom. We will make the curtain with 3cm of fabric above the top underside of the eyelet where it sits on the pole. We add this automatically so simply measure from the top of your curtain pole.

Wave Curtains
Measuring for your Wave curtains is very much like measuring for a blind, as the track will be included with the curtains. Just follow our simple instructions below to be confident that your new curtains will fit perfectly.
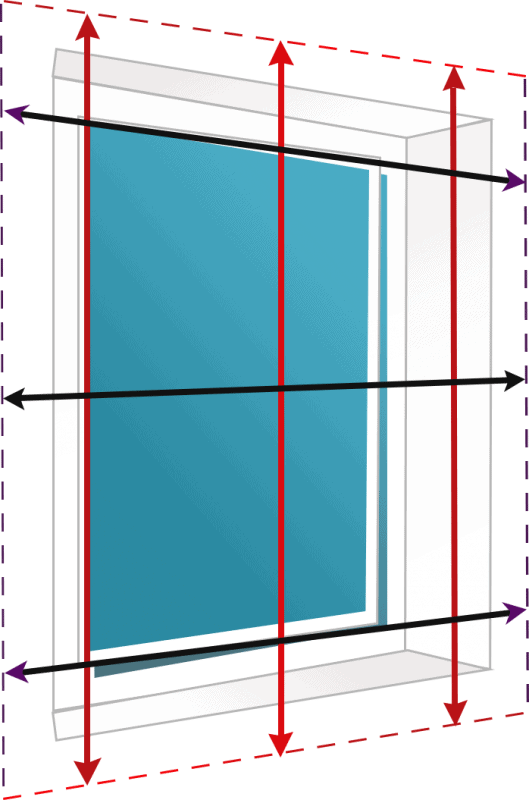
Exact Fitting (Recommended)
This is the measurement you need to take if you want your Wave curtains to fit outside the window recess, overlapping on all sides. Measure the size of the recess, then add a little extra on all sides to ensure adequate coverage.
✔ Measure the exact size of the area you would like the Wave curtains to overlap. To minimize light leakage we recommend that you overlap the window recess by at least 150mm at the top and 150mm each side.
✔ The overlap at the bottom is a matter of personal choice but please take into account obstacles such as radiators.
✔Use a metal tape measure, cloth ones can stretch and give you inaccurate measurements.
Bay Windows
Exact fitting is also the fitting method we recommend if you have a bay window. Treat the whole bay as one big window and follow the same process as above.
Top-Tip:
If you are replacing existing curtains and you want the same size, simply measure the width of the pole or track, and the drop from the top of the pole or track to the bottom of the curtains, and specify exact fitting, we will make your Wave Fold curtains the same size overall (we will send the track with your Wave Fold curtains, so the track will be included in the size). Please note that the spacing between folds on our Wave Fold curtains is approximately 9cm, so the appearance may vary slightly from your current curtains.
Recess Fitting
This is the measurement you need to take if you want your Wave curtains to fit inside the window recess. Measure the full width and height of the recess [the size of the hole if you like] and we will make the appropriate deductions to ensure a perfect fit.
✔Measure in 3 places for both the width and the drop, use the smallest measurements.
✔ Don’t make any deductions, we will deduct 10mm from the width, and 15mm from the drop, to ensure a perfect fit.
✔Use a metal tape measure, cloth ones can stretch and give you inaccurate measurements.